Microsoft Internet Explorer has a built-in security feature that classify sites into four separated zones, namely Internet, Local Intranet, Trusted Sites, and Restricted Sites. Each of these zones has different way of handling site contents. For example, downloading content from sites in Internet zone will prompt a message to the user before it is able to be downloaded, while downloading content from sites in Local Intranet zone can go without any prompt. It is important to configure site zone mapping correctly. In a domain environment, administrator can put less effort to configure internet site zone using Group Policy Preferences.
How to Configure Internet Site Zone using Group Policy Preferences
There are numerous way to configure internet site zone using Group Policy Object, but configuring it this way will disable the user from manually adding sites to a zone. On a dynamic environment, it is best to configure internet site zone using Group Policy Preferences instead, as this way can provide consistency of the site zone mapping without limiting the user ability to add new site zone mapping.
The example below will show how to create Group Policy Preferences to add site www.mustbegeek.com into Trusted Sites zone.
1. Find the setting
Use Group Policy Management console to locate one of these settings below:
- User Configuration > Preferences > Windows Settings > Registry = With this way, the site zone mapping will follow the user on any computer it is logged in to
- Computer Configuration > Preferences > Windows Settings > Registry = With this way, the site zone mapping will be applied to any users logged in to the computer
In this example, we want this policy to be applied at the user level so the setting explained in first way will be used.
When the setting has been located, right click on a blank space in the right pane and choose New > Registry Item
2. Create mapping for a site
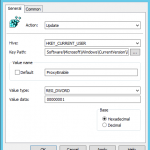
The registry to be created to map a site into zone will be kept at Software\Microsoft\Windows\CurrentVersion\Internet Settings\ZoneMap\Domains. It is a little bit complicated as one site will be stored as a key with the site zone as the value, in other words, to store www.mustbegeek.com as a Trusted Sites, we need to append “\mustbegeek.com\www” at the end of the above mentioned path. See figure below for example:
On the value name write “http” or “https” depending on the protocol used by the site, and set the value type as REG_DWORD. Then, fill in the value data with “0000002” in hexadecimal to indicate that it is in the Trusted Site zone.
3. Repeat the setting for other sites mapping
Repeat step 2 above to make mapping for other sites. Adjust the value data according to the table below to map it into the desired zones:
| Value data | Zone name |
| 00000001 | Local site zone |
| 00000002 | Trusted site zone |
| 00000003 | Internet zone |
| 00000004 | Restricted site zone |
4. Link the policy and verify the result
Check the policy result on client’s Internet Explorer > Settings > Internet Options > Security tab. For example select Trusted Sites icon and click on Sites button.
The site listed for the selected zone will be displayed.
Conclusion
Site zone mapping configured on Group Policy will be reflected on the Internet Explorer setting once policy is applied. If the policy is not applied as intended, administrator can check into the registry path as above and see if the required keys and values has been created correctly as shown below:
Remember, the command gpupdate /force can be used to force the policy to be refreshed on demand, and the command gpresult /r on the user can be used to verify the policy object has been applied.
And that’s how to configure internet site zone using Group Policy Preferences.
You may also like -
Arranda Saputra
Latest posts by Arranda Saputra (see all)
- How to Move Documents Folder in Windows 10 - August 31, 2020
- How to Move Desktop Folder in Windows 10 - August 31, 2020
- Restore DHCP Server in Windows Server 2012 R2 - January 9, 2020


