Now that you’ve learned to back up your DHCP server, you need to learn to restore it as well. Of course, what’s the point of having a backup if you don’t know how to restore it? In this article, we’re going to demonstrate the steps to Restore DHCP Server in Windows Server 2012 R2. It’s very useful in case you want to recover your DHCP server from a serious failure, or if you want to migrate your DHCP server to another server.
Step by Step – Restore DHCP Server in Windows Server 2012 R2
The function to restore DHCP server in Windows Server 2012 R2 is a built-in feature in the DHCP Server role. Therefore, you need to have DHCP server role installed in the target server where you will perform restore. You will also need to copy the DHCP server backup files to the target server if it’s not there yet.
To do it using GUI, in the target server, open Server Manager > Tools > DHCP.

In the DHCP Server console, right click the server name and select “Restore“.

Locate the folder where you put the DHCP backup files, and click OK. In this example we have the DHCP backup files in C:\Backup folder.

If you copy the DHCP backup files from another server, you may be prompted with permission issue as shown in the figure below. Just click “Yes” button to automatically correct all the possible permission issues.

The system will also ask if it’s okay to restart the DHCP server service in order the perform restore. You must confirm it by clicking the “Yes” button again.

Wait for a while (usually a few seconds – depending on your DHCP database size) and you will get notification that DHCP server data has been successfully restored. Click OK to confirm.

After this, if you correctly follow all the steps, you will be able to see all the restored DHCP settings like the lease, reservation, filter, etc.

Alternatively, you can restore DHCP server role using PowerShell. The command to do it is:
Restore-DhcpServer -ComputerName [TARGET_SERVERNAME_OR_IP] -Path [DHCP_BACKUP_FOLDER]
Replace all the values in the bracket according to your configuration. For example, the command for our case is:
Restore-DhcpServer -ComputerName 192.168.10.100 -Path "C:\backup"
Yes, it is that easy.
Troubleshooting DHCP Database Not Restored Correctly
Upon restoring the DHCP server, you may be faced with the error message: “The database was not restored correctly. No changes were made. For more information, please see Event Viewer on the specified server.“

Unfortunately, the event log may not be helpful at all. The best thing to try in this situation is moving the DHCP backup files to C:\windows\system32\dhcp\backup (the system default location) in the target server. Also, it is even better to verify if the backup files are all intact upon backing up the DHCP server.
And that’s how you successfully restore DHCP server role in Windows Server 2012 R2.
You may also like -
 Backup DHCP Server in Windows Server 2012 R2
 Configure DHCP Scope in Windows Server 2012 R2
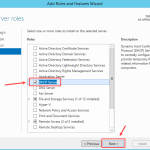 Installing DHCP Role in Windows Server 2012 R2
 Configure DHCP Reservation in Windows Server 2012 R2
 Configure DNS Dynamic Update in Windows DHCP Server
 Add Host A Record in Windows DNS Server
 Backup and Restore Group Policy Object in Windows
Arranda Saputra
Latest posts by Arranda Saputra (see all)
- How to Move Documents Folder in Windows 10 - August 31, 2020
- How to Move Desktop Folder in Windows 10 - August 31, 2020
- Restore DHCP Server in Windows Server 2012 R2 - January 9, 2020